
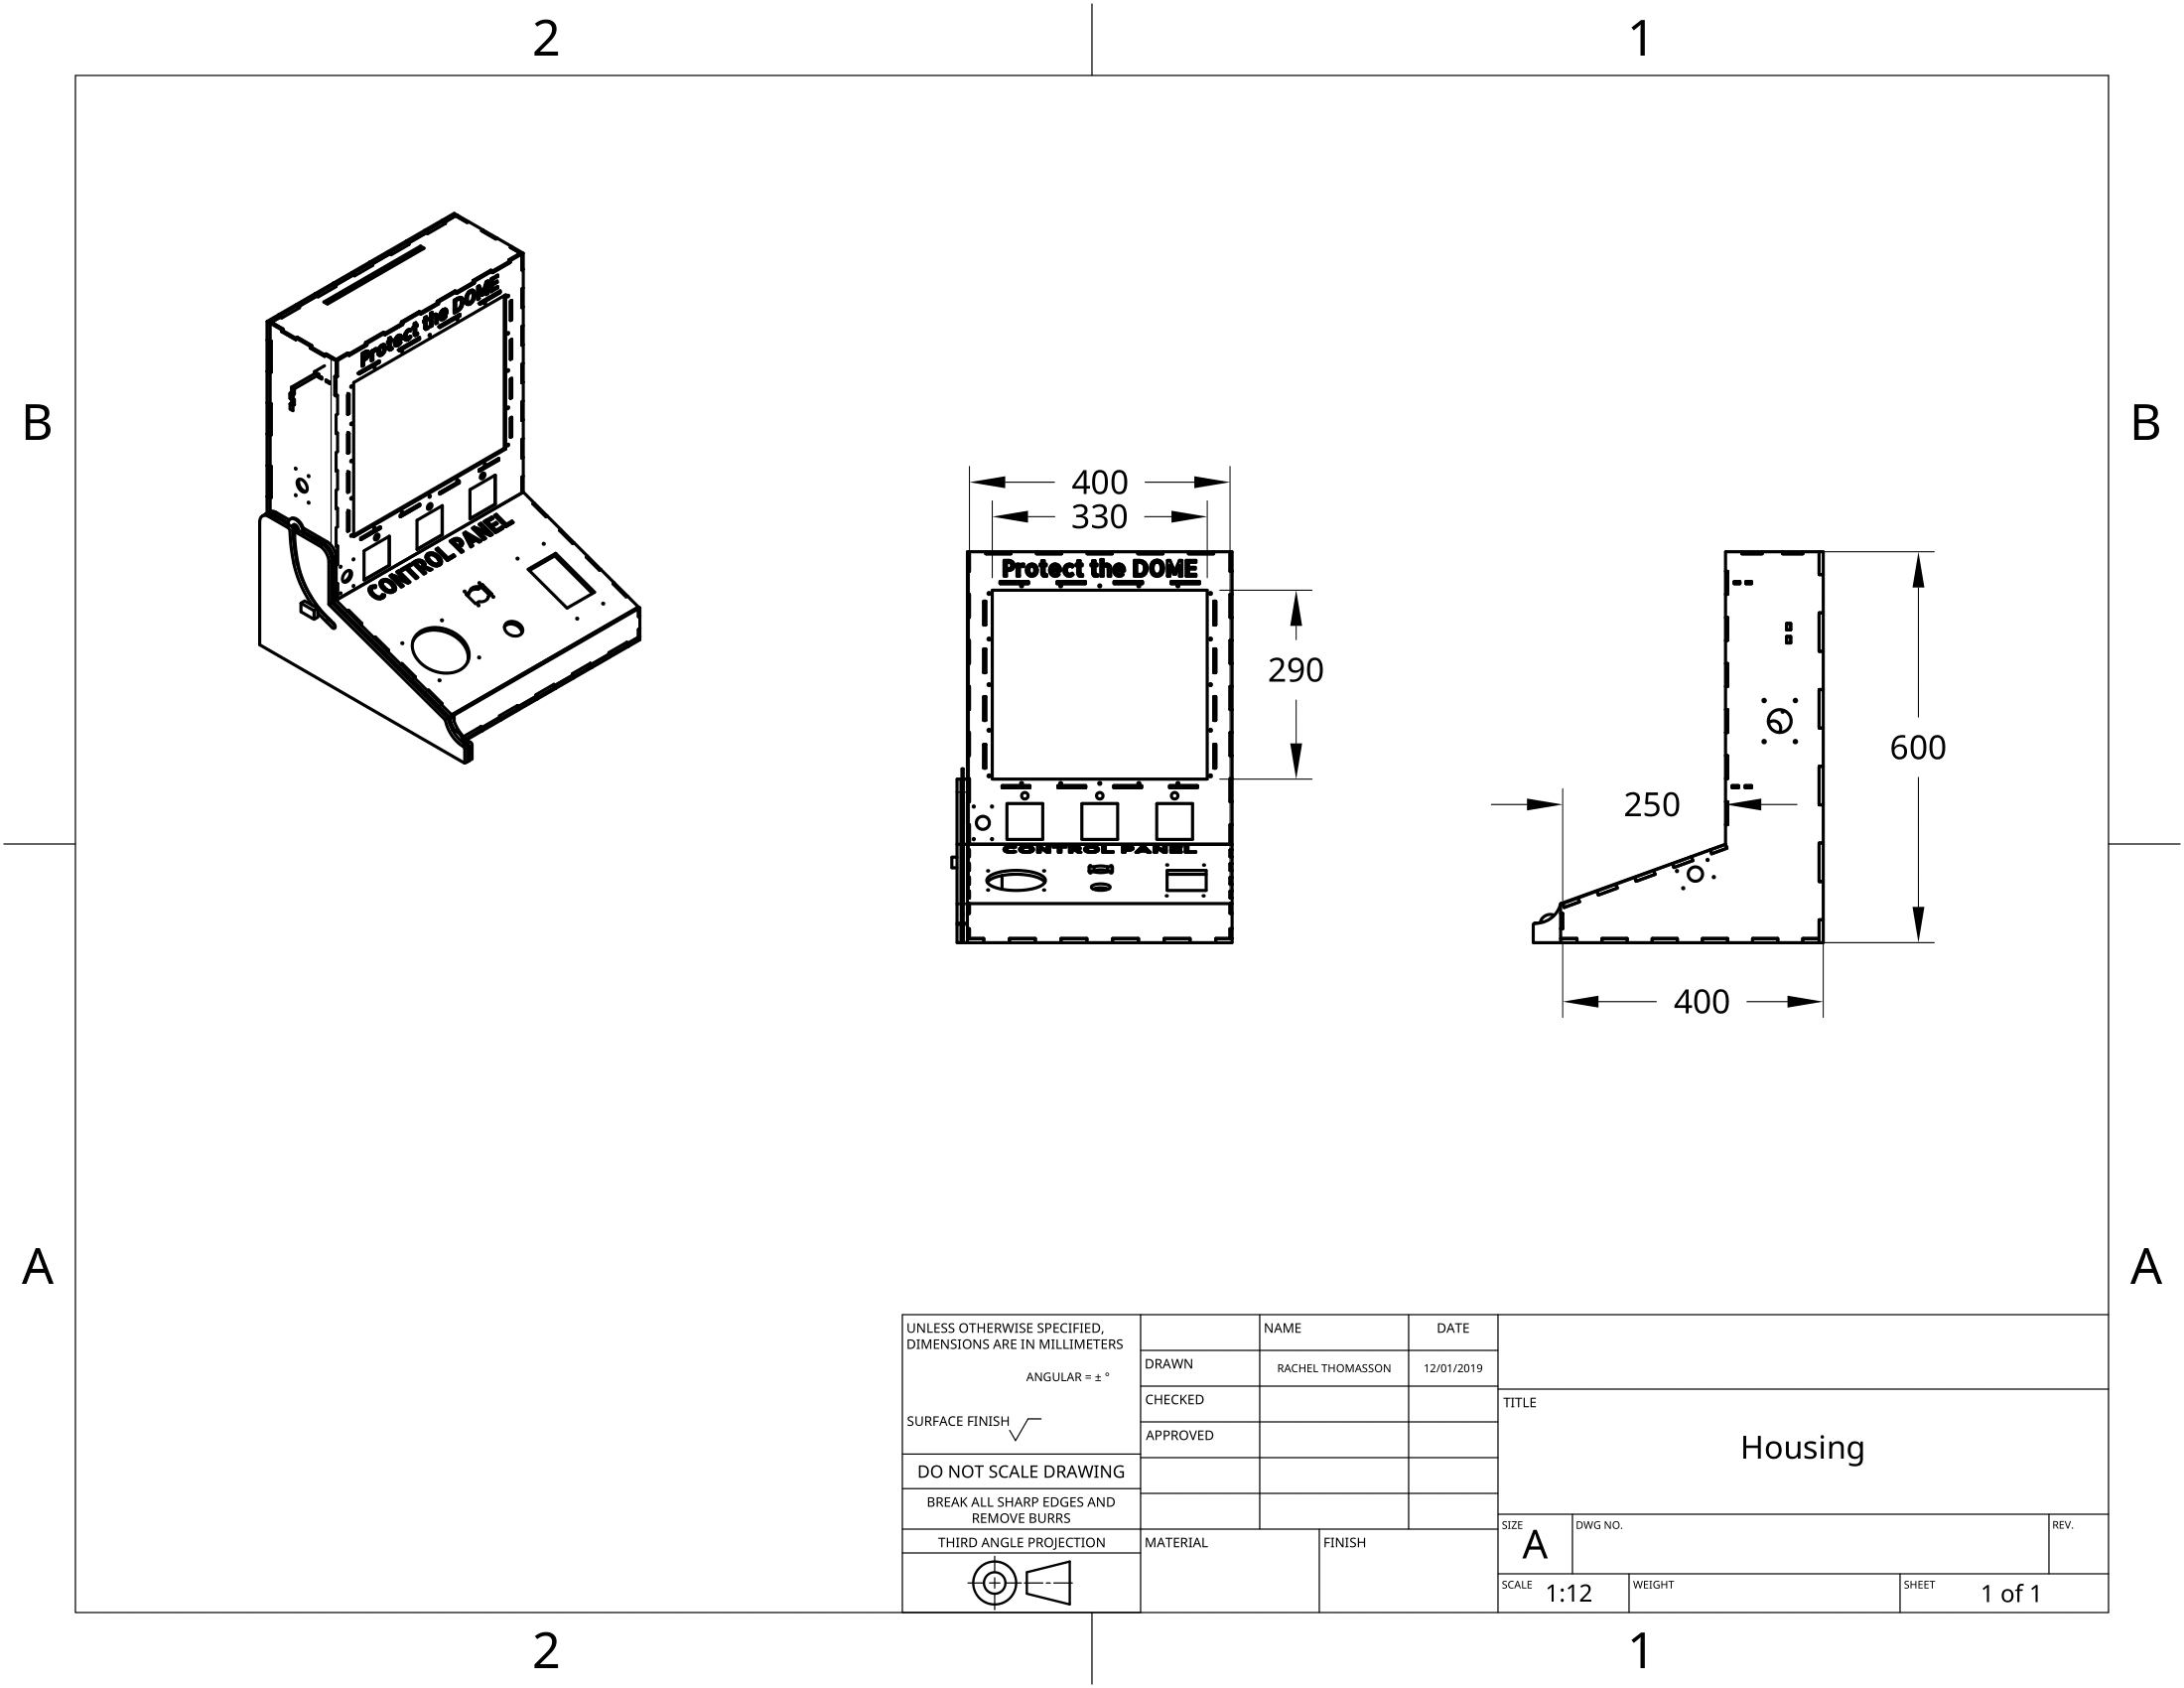
The form of our game's housing was inspired by classic arcade cabinets. The layout was designed to make the user feel like a control engineer situated at a control panel, viewing the Martian BioDOME through a window in the control room. Our compact laser cut structure is 43cm wide, 65cm tall, and 47cm deep. It is constructed from a combination of 1/8" and 1/4" Duron sheets, held together with a combination of lightly press-fitted tabs (0.006" interference) and wood glue.
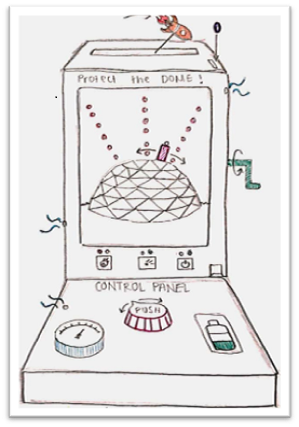
The image slider to the right moves back in time through our design process, from final product, to CAD model (developed in Onshape), to a sketch from our initial brainstorming session. The mechanical design was crucial for understanding the placement of components as well as designing overall gameplay and user experience.
Four colors of spraypaint were used to give the effect of a starry sky over the DOME; spraypaint and hand painting were combined to create the red, Martian horizon. Metallic gold spraypaint was used as an accent and for the control panel, and metallic silver was used for the DOME.
Three lines of LEDs are stationed in the sky above the DOME. Lighting up these LEDs simulates meteorites falling towards the DOME.
Relevant CAD files can be found here.
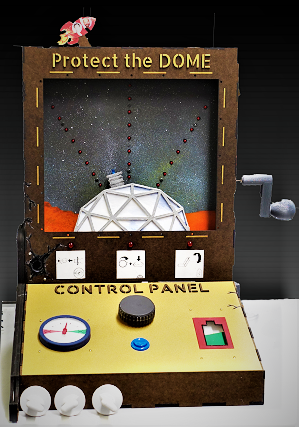
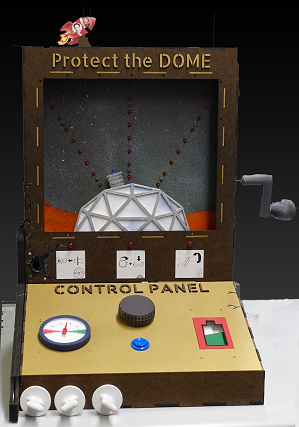
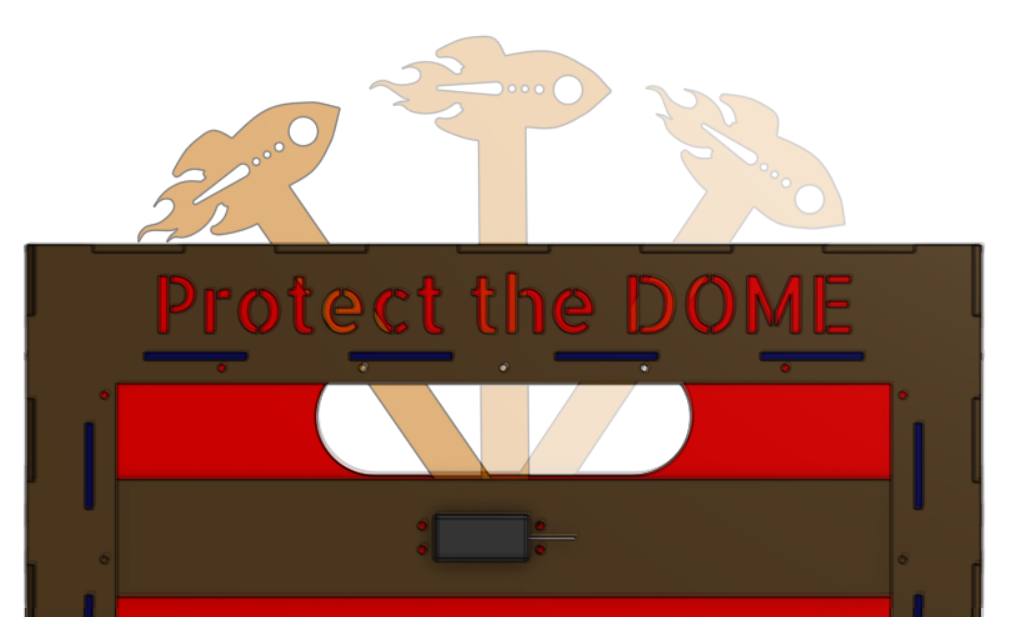
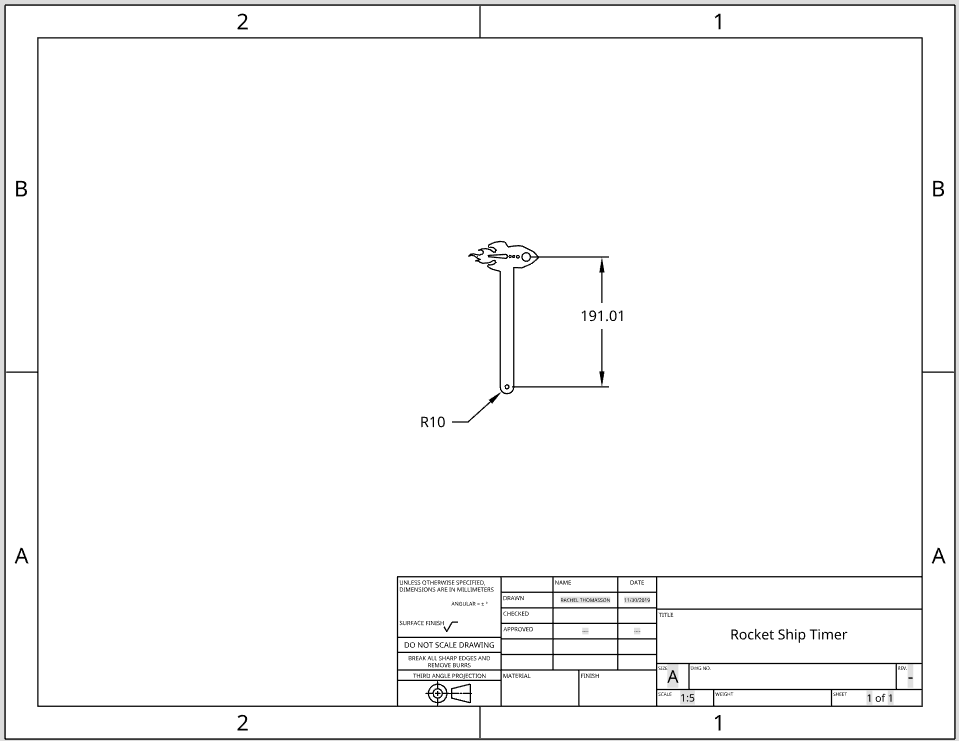
A laser cut rocket ship (1/8" Duron) protruding from the top of the cabinet indicates the passage of time to the user. It is actuated by a servo motor that moves incrementally from one side of the cabinet to the other throughout the game. On the final product, the rocket was fitted with images of Ed Carryer and Elon Musk to show that the time pressure was due to the bosses coming for a check-up. If the user survives until their bosses arrive on Mars, they win the game!
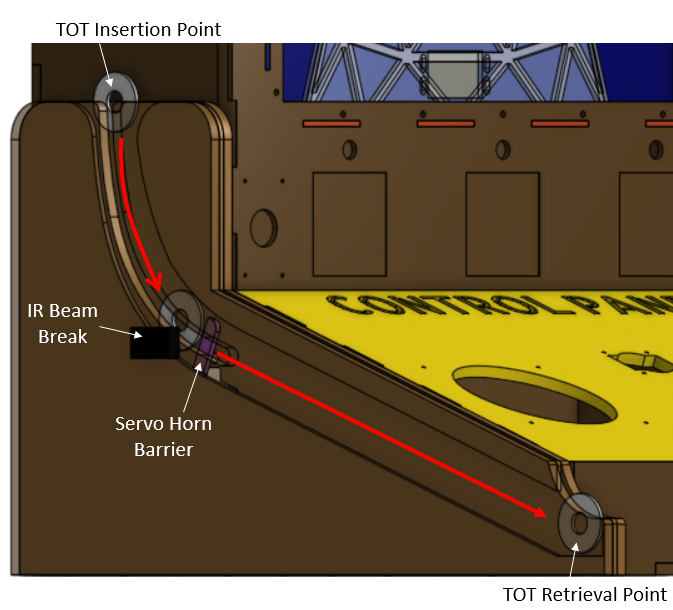
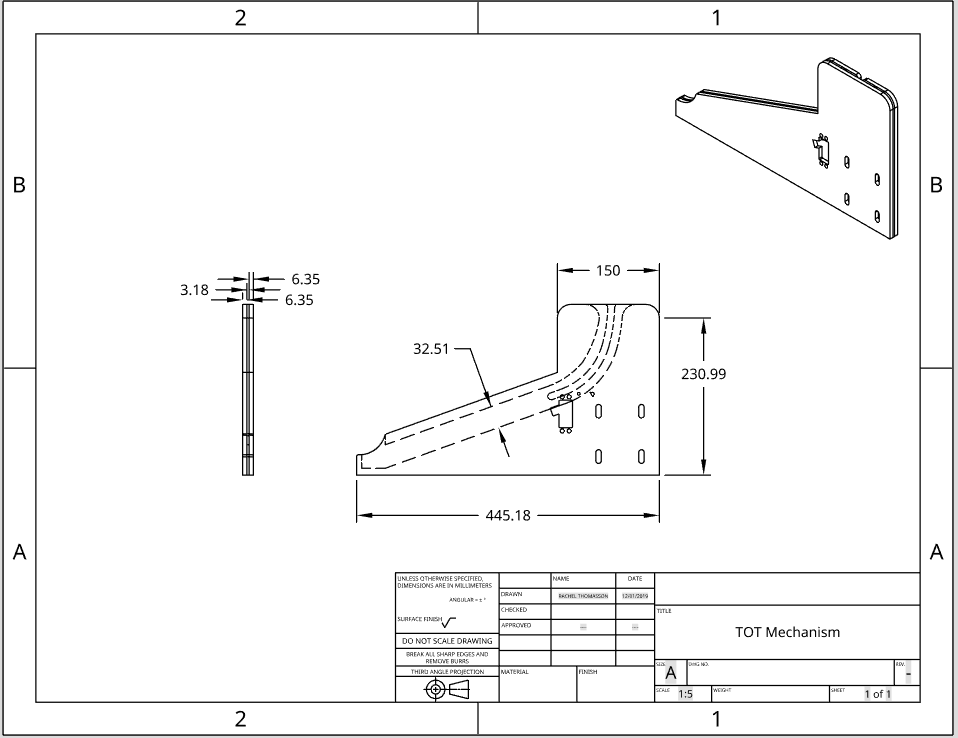
To begin the game, the user must insert a TOT (a stainless steel washer that serves the role of a token in a classic arcade game) into the cabinet. The TOT mechanism, located on the left side of the cabinet, is comprised of a channel that allows it to roll from the insertion point to the retrieval point. This was manufactured with three layers of laser cut Duron. To keep the TOT from rolling all the way to the retrieval point before the game is over, a servo was mounted such that the servo horn obstructs the TOT's path and holds it partway through the channel. When the TOT is in this location, it breaks an IR beam to signal that a TOT was inserted and the game should begin. At the end of the game, the servo rotates, moving the servo horn barrier and allowing the TOT to roll to the retrieval point.
A cutaway was added to the outer layer of Duron to allow the TOT to be manually removed from the channel in case of software or electrical failure.
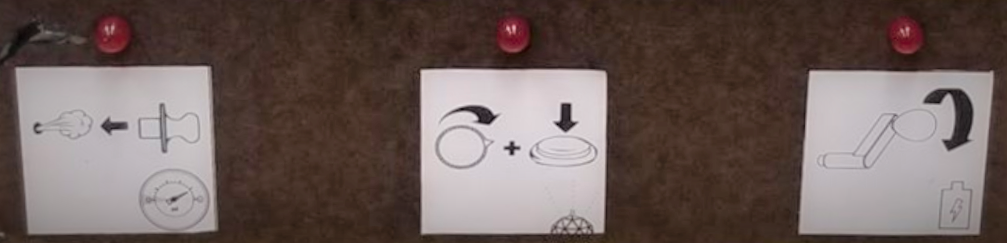
The game requires users to participate in three distinct interactions:
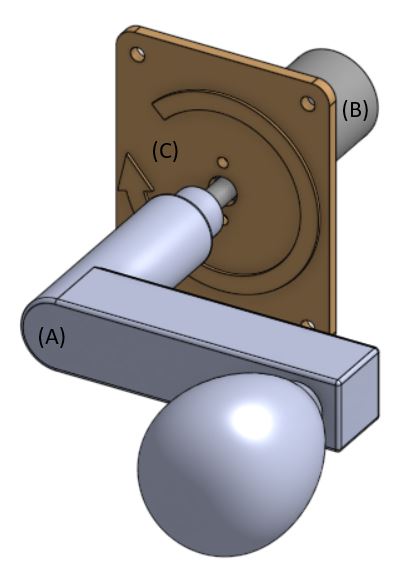
The first interaction requires users to manually turn a crank to power up the cannon. The Power Crank Assembly, pictured to the left, consists of three components: (A) a power crank (handle and knob) 3D printed from PLA, (B) a DC motor that is backdriven to produce a voltage when the crank is turned, and (C) a Duron mounting plate for easy attachment to the arcade cabinet.
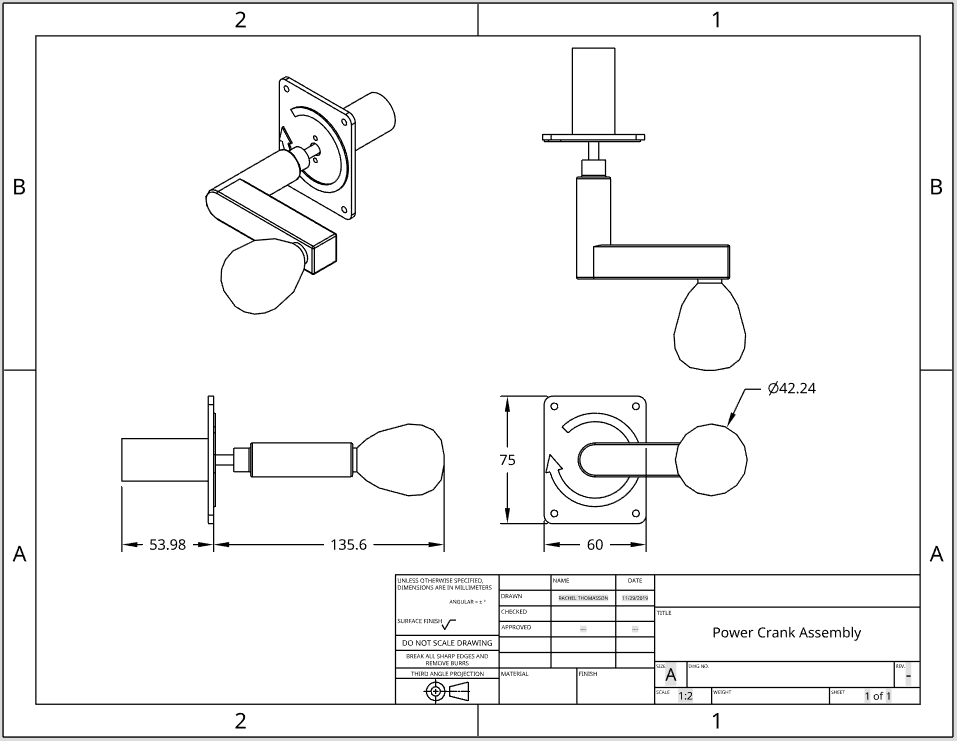

A second interaction requires users to control a cannon to shoot down meteorites that threaten their DOME. Meteorites are indicated by lighting up LEDs incrementally closer to the surface of the DOME. The cannon is positioned by turning a 3D printed (PLA) knob that is attached to a potentiometer. The knob is divided into two sections: the lower section is connected to the potentiometer and houses a vibration motor (see User Feedback section below), while the upper section encloses the vibration motor.
An off-the-shelf button is mounted below the knob. Pressing the button fires the cannon, producing a virtual laser beam in whatever direction the cannon is pointing. Aiming the cannon in the direction of a falling meteor and then firing the cannon by pressing the button results in the meteor's destruction.

The final interaction requires users to locate and plug air leaks. There are three potential sources for air leaks located at various points on the cabinet, which are indicated by a hole in the housing and painted cracks. Hall sensors are used to determine whether a given leak was successfully plugged. Each air leak mechanism is comprised of three parts: (A) a small computer fan that blows air through the hole, (B) a sensor holder for the hall sensor, and (C) a plug for the air leak with an embedded magnet.
Both the sensor holders and air plugs were 3D printed out of PLA.


While interacting with the game, users are provided feedback to help them delegate their attention and keep an eye on their progress:

A power gauge on the control panel provides a visual indication of the power level achieved by the user turning the crank. Begninning at empty, the user must crank until the power gauge is completely full. The body of the gauge, which provides the battery shape, was 3D printed from PLA. A cardboard half circle was painted green and attached to a servo horn to create the power level indicator. This causes the battery shape to "fill up" with a green color as the servo turns.


A cannon shape, made from 1/8" laser cut Duron, is mounted behind the DOME. As the user turns the cannon positioning knob, the cannon rotates. This allows users to visually line the cannon up with falling meteors.
A small blue LED is mounted to the tip of the cannon. It lights up whenever the user presses the button below the cannon positioning knob to indicate that the cannon was fired.


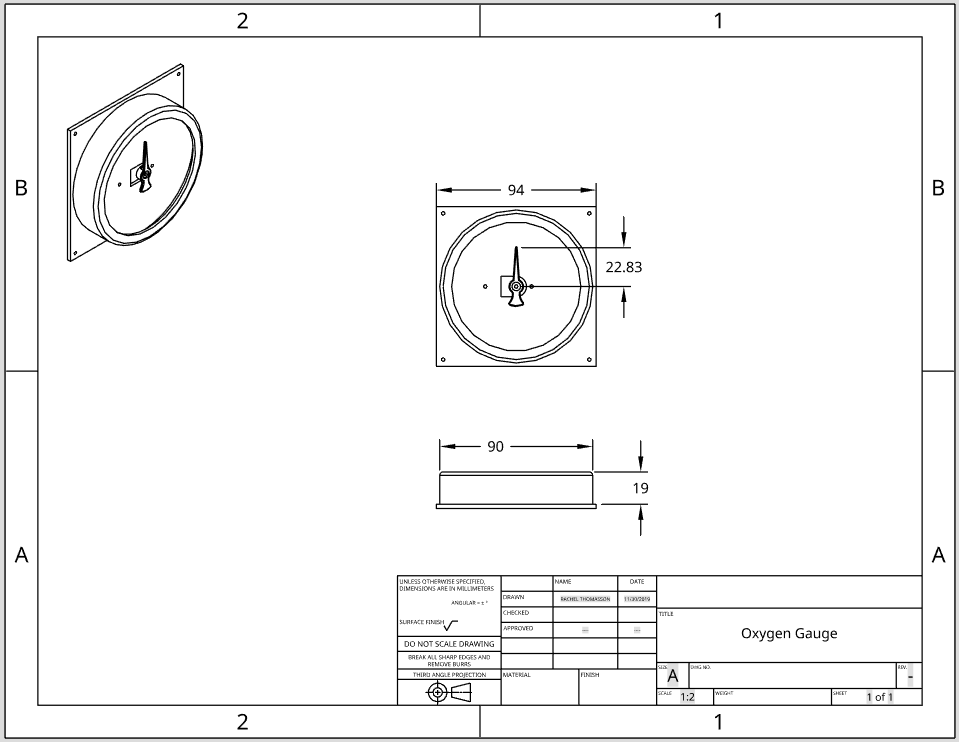
An oxygen gauge indicates current oxygen levels throughout the game. When an air leak develops, the oxygen level begins to drop. The user must plug the air leak before the oxygen gauge reaches zero to avoid an untimely death. The gauge (both the body and indicator needle) was 3D printed with PLA and the small indicator needle is actuated with a servo motor.
Three crisis indicator LEDs are located above pictorial descriptions of the three interactions. One at a time, these indicators light up to tell the user what they should do next, whether it be turn the power crank, shoot down a meteor, or search for an air leak.
The small vibratory motor mounted inside the cannon positioning gauge vibrates whenever the user successfully destroys a meteorite using the cannon.